Make a DIY StoryCorps interview recording studio at your school
By Laura McClure on April 13, 2016 in TED-Ed Innovative Educators
TED-Ed Innovation Projects are designed by educators, for educators, with the support and guidance of the TED-Ed Innovative Educator program. You are welcome to duplicate or modify this project to meet your school needs!
In this TED-Ed Innovation Project, educational technologist Jimmy Juliano shares his instructions for how to make a DIY recording booth:
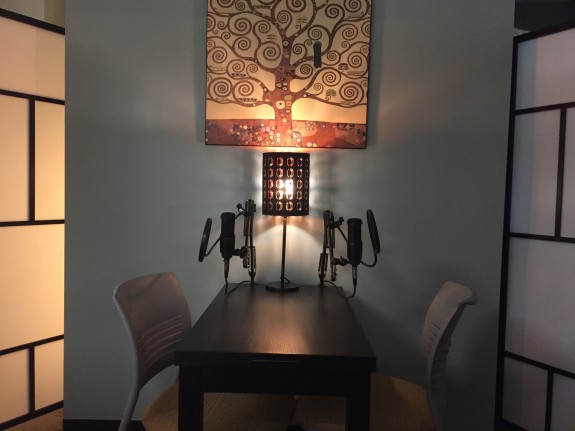
1. Find a dedicated interview space. It doesn’t take much to DIY this at your school. I converted my office into a combination of lounge and walled-off sound station, but any private space will do the trick — heck, it could be a large closet in a classroom. Keep it simple and intimate.
2. Add a table and a couple of chairs. I bought an IKEA table and repurposed a few chairs from my library. I also added a lamp, room dividers and art. The lounge is a comfortable and relaxing space for interview participants to learn about the process and gather their thoughts. The sound station is a private space for the audio recording to occur. Again, that’s all optional. All you really need is a small, quiet place to record audio.
3. Determine your goals. Are the audio files meant just for the interview participants, or do you want to put clips online? If you’re putting clips online, you’ll need a website and audio hosting. Depending on how you host audio files online, you may have to pay some web fees. I share all of the complete, raw interview files with interview participants through Google Drive, but I also cut out snippets to share with the world. For that, I use a free Weebly account and a paid SoundCloud account. (I upgraded to a paid SoundCloud account to obtain additional features, primarily to disable comments — I didn’t want to deal with any potential problems). All the hosting and sharing online can definitely be done for free with Google tools — I just loved the look and feel of embedded SoundCloud clips.
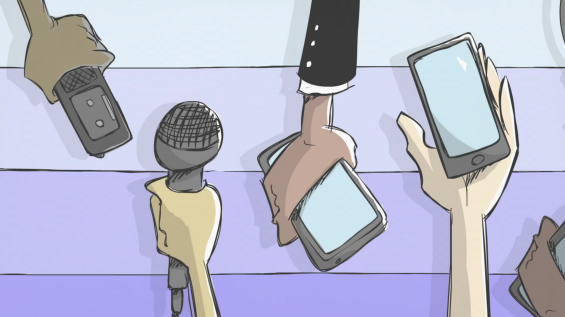
4. Decide what sound equipment to buy. I’m not an AV guy by nature, so I didn’t know exactly what to purchase. Happily, StoryCorps has a guide for replicating their process at a library, so I took their DIY manual and ran with it. A couple of cheap, USB mics plugged into a computer will work for recording just fine. If you’re looking for more optimum sound quality to capture that professional feel, you can purchase a digital recorder, SD card, and a couple high-quality, tabletop microphones for under $150.
5. Test, test, test! Make sure all of your equipment works. If it doesn’t, figure out why.
6. Name your recording studio. Once you’ve got the studio set up, give it a name! Here’s ours: mixtape1285.
7. Set up a registration process to schedule interview times. I tried a few different methods before landing upon Google Calendar Appointment Slots. It’s worked marvelously.
8. Ask a few student pairs to record interviews. Find your “go-to students” so that you can start building momentum and test the process. A StoryCorps interview may be a bit of an abstract concept, so ask participants who you know will enjoy the experience, and start from there. Here are some great interview questions to choose from.
9. Spread the word in school. Promote the studio as a resource for history class projects, connect with StoryCorps, send out emails, talk to your best teacher friends, run interview “theme” weeks, try it out in your TED-Ed Club — anything at all to inspire students to hop into the studio and share their stories.
10. Share what you learn. Here are 3 specific things I’ve learned since opening the studio doors: Number one: the students love the space. There’s always a “wow” moment when they enter the studio. The lighting, room dividers, and audio setup really create a professional, yet intimate feel. Number two: the interviews always go longer than students anticipate. On average, students talk for about 20-25 minutes, and they are always shocked when I tell them it was that long. Many tell me that it feels like 10 minutes. Number three: every interview has featured some sort of a revelation. Interview pairs have been friends going into the experience, but there is always that moment where something new is learned about the other person. It’s powerful and touching.
Success can measured in many ways: the number of students who use the recording studio, the number of teachers who incorporate the interview model into their classrooms, and — of course — student and educator testimonials. So far, all of the direct feedback I’ve received has been positive. Here are some quotes from students and educators:
“One day students can look back on their interviews and conversations and remember a moment in time when they were in high school. I wish I had that.” — Joe De Rosa, Social Studies instructor and TEDxLFHS organizer
“I would definitely recommend it. It made me very nostalgic, and I really enjoyed reliving some great memories.” — student
“I really liked the feel of being in somewhat of a real recording studio.” — student
One of my biggest hopes is that this project builds empathy and fosters an environment where all of our stories matter. If you have questions about how to make this project work for your school, please reach out on Twitter to TED-Ed and me!
To learn more about the TED-Ed Innovative Educators program, click here.
1 Comment
About this article
Jimmy Juliano, an educator in Illinois, is a participant in the TED-Ed Innovative Educator program.
After engaging in two months of online professional development and attending a TED conference, each TED-Ed Innovative Educator is challenged to create and share an innovative project that can be replicated by other educators.
nice post